체크박스 꾸미는 방법
체크박스를 바로 꾸미는 건 어렵습니다. 그래서 체크박스와 연결된 라벨(label)을 만들고 라벨을 꾸밉니다. 라벨을 클릭하면 체크박스가 체크되고, 다시 클릭하면 체크가 해제되는 성질을 이용하는 겁니다.
체크박스 만들기
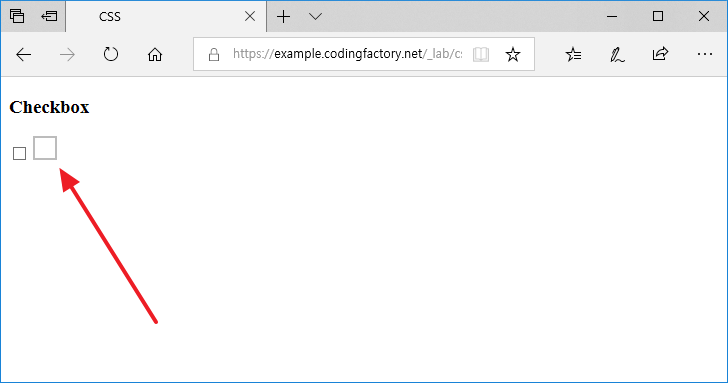
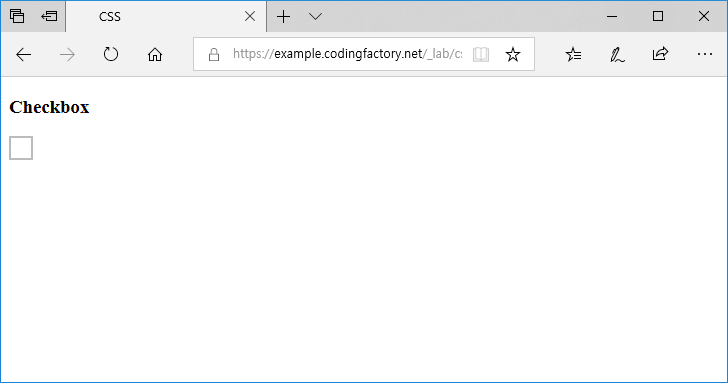
빈 라벨을 가진 체크박스를 만듭니다. for 속성을 이용해서 체크박스와 라벨을 연결시켜야 합니다.
| <!doctype html> <html lang="ko"> <head> <meta charset="utf-8"> <title>CSS</title> </head> <body> <h3>Checkbox</h3> <input type="checkbox" id="cb1"> <label for="cb1"></label> </body> </html> |

라벨 꾸미기
라벨을 원하는 모양으로 꾸밉니다.
| input[id="cb1"] + label { display: inline-block; width: 20px; height: 20px; border: 2px solid #bcbcbc; cursor: pointer; } |
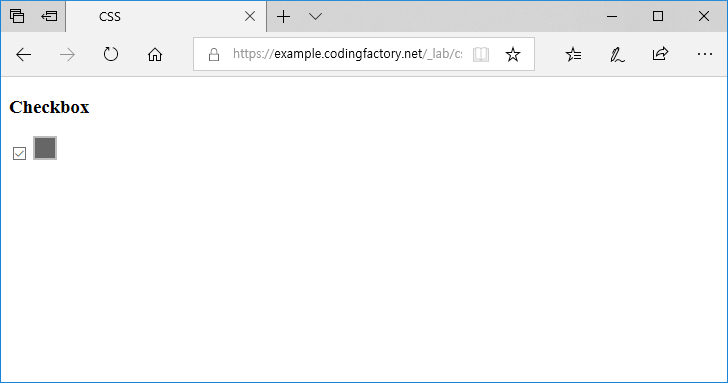
라벨을 클릭했을 때의 모양을 만듭니다.
| input[id="cb1"]:checked + label { background-color: #666666; } |
체크박스 숨기기
체크박스를 보이지 않게 합니다.
| input[id="cb1"] { display: none; } |
전체 코드
1 2 3 4 5 6 7 8 9 10 11 12 13 14 15 16 17 18 19 20 21 22 23 24 25 26 27 | <!doctype html> <html lang="ko"> <head> <meta charset="utf-8"> <title>CSS</title> <style> input[id="cb1"] + label { display: inline-block; width: 20px; height: 20px; border: 2px solid #bcbcbc; cursor: pointer; } input[id="cb1"]:checked + label { background-color: #666666; } input[id="cb1"] { display: none; } </style> </head> <body> <h3>Checkbox</h3> <input type="checkbox" id="cb1"> <label for="cb1"></label> </body> </html> |